What tools do you need to start fly tying?
Fly Tying Vise: Essential Tools for Effective Fly Tying Station Setup and Organization
Creating a successful fly tying setup begins with selecting the right tools that enhance both efficiency and enjoyment. A quality fly tying vise is essential, as it securely holds your materials in place, allowing for precision while you work. From my experience, investing in a well-crafted tying station can streamline your process by providing a dedicated workspace that keeps everything organized.

In addition to the vise and station, a comprehensive fly tying kit is invaluable for beginners and seasoned tiers alike. It often includes essential materials such as various types of fly tying thread, which I find crucial for constructing durable and effective flies. An organized fly tying mat can also help maintain order, preventing lost materials and making the entire experience more enjoyable.
As I continue to refine my fly tying skills, I’ve learned the importance of having a systematic approach. Utilizing a fly tying organizer to keep my supplies sorted allows me to focus on creativity rather than searching for materials. This setup not only boosts efficiency but also enhances the quality of my work, leading to better fishing outcomes.
Understanding Fly Tying Vises
A fly tying vise is an essential tool for any tier, allowing for precise manipulation of the hook while I create intricate fly patterns. Various types of vises cater to different styles and preferences, with features that enhance the tying experience.
Types of Fly Tying Vises
There are several types of fly tying vises available on the market. The most common include:
-
Rotary Vises: These allow full rotation of the hook for easy access from all angles. They are ideal for complex patterns.
-
Stationary Vises: A basic option, perfect for beginners. These hold the hook still and are generally more affordable.
-
Travel Vises: Compact and portable, designed for those who tie flies on the go. They sacrifice some features for portability.
Understanding the differences helps me choose the right vise for my tying needs.
Features of Premium Fly Tying Vises
Premium fly tying vises offer several features that improve my tying experience:
-
Adjustable Jaws: These accommodate various hook sizes, ensuring a secure grip.
-
Material Quality: Often made from stainless steel or aluminum, these vises provide durability and resistance to corrosion.
-
Fine Adjustments: Allows for precise positioning of the hook. This is crucial for achieving consistent results.
-
Magnetic Bases: Some higher-end vises include a magnetic base for stability while tying.
These features elevate the quality of my work, making them worth considering when I decide to buy a vise.
Setting Up Your Fly Tying Vise
Setting up my fly tying vise correctly enhances my overall tying experience. Here’s how I do it:
-
Choose a Suitable Workspace: I ensure I have a clean, well-lit area.
-
Stabilize the Vise: If using a rotary vise, it often comes with a heavier base to prevent movement. I double-check that it’s stable.
-
Position the Hook: Adjust the jaws to securely hold the hook at eye level for ease of access.
-
Maintain a Comfortable Height: I set the vise at a height where I can tie comfortably, preventing strain on my back and neck.
By following these steps, I optimize my fly tying setup, improving both comfort and efficiency.
Designing Your Fly Tying Station
Creating an effective fly tying station is essential for enhancing my efficiency and enjoyment during the tying process. A well-organized and customized workspace can significantly improve my workflow and creativity.
Essential Components
When designing my fly tying station, I prioritize the essential components. The fly tying vise is the centerpiece; it must securely hold hooks of varying sizes. I also include a quality fly tying kit containing various materials and tools, such as scissors, bobbins, and dubbing needles.
A sturdy fly tying mat protects my workspace while providing a non-slip surface. Adequate lighting is critical as well; I often use a bright, adjustable lamp to avoid straining my eyes. With these components, I set the foundation for a functional tying station.
Organization Tips
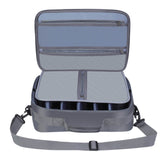
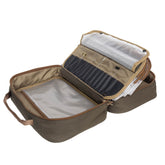
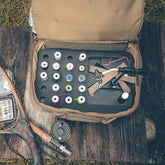
Keeping my tying station organized is crucial for maintaining focus. I utilize a fly tying organizer, where I categorize materials by type: feathers, threads, beads, and other items. This prevents clutter and makes it easy to locate what I need.
I also employ small containers and racks for tools to keep them accessible. Creating designated areas for each component ensures everything has its place. Labeling drawers or bins helps avoid confusion and saves time when I’m in the middle of a project.
Customizing Your Workspace
Personalizing my fly tying station allows me to create a comfortable and inspiring environment. I consider adding items that reflect my personality, like artwork or photos related to fishing. This helps me feel more connected to my passion.
Adjusting the height of my tying station is another aspect of customization. I ensure that my workspace suits my seating position perfectly, allowing for better posture during long sessions. Additionally, I sometimes incorporate ergonomic tools to enhance comfort, further improving my overall experience while tying flies.
Choosing the Right Fly Tying Kit

Selecting the right fly tying kit is essential for both beginners and seasoned tiers. A well-chosen kit can significantly enhance the efficiency and enjoyment of the fly tying process.
Beginner Kits vs. Advanced Kits
When I first started out, I found that beginner kits are designed to provide all the basic tools and materials needed to get started. These typically include a simple vise, a pair of scissors, and a range of threads and hooks. They are often affordable and perfect for those just beginning their fly tying journey.
For more advanced tiers, advanced kits include higher-quality vises, a wider variety of materials, and more intricate tools. These kits often have specialized items like dubbing tools, whip finishers, and additional hackles. Investing in an advanced kit pays off as it allows for more complex patterns and techniques.
Kit Content Overview
A comprehensive fly tying kit should contain essential tools and materials. Here’s what to look for:
- Vise: Ensure it securely holds hooks of various sizes.
- Tools: Scissors, bobbin holders, and hackle pliers are vital.
- Materials: Look for a variety of threads, feathers, and fur.
- Instructional Material: Some kits include patterns and tutorials for beginners.
Having a balanced mixture of these components enhances versatility and encourages creativity in tying.
Product Recommendations
For beginners, I recommend the Orvis Fly Tying Kit. It's affordable and contains everything needed to get started, including a user-friendly guide. For those who are more experienced, the Regal Medallion Vise Kit is a premium choice that offers precision, durability, and ease of use.
Lastly, always check if the kit has a variety of materials. Having multiple color options can inspire new fly designs. Remember, the right fly tying kit can improve my skills and make the experience enjoyable. If you're ready to start or upgrade, consider specific kits that meet your needs.
Fly Tying Organizers and Storage Solutions

In my experience, having the right organizers and storage solutions transforms the fly tying process. Efficient systems help keep materials at hand, ensuring a smoother tying experience and better results. Here are key strategies for enhancing your workspace.
Streamlining Your Tying Process
A well-organized tying station boosts productivity. I prefer using a fly tying organizer with adjustable compartments to sort materials like hooks, beads, and feathers. This design allows for quick access and minimizes time spent searching.
Consider these options:
- Drawer Units: Ideal for storing larger items.
- Clear Totes: Offer visibility and keep materials dust-free.
- Magnetic Strips: Perfect for holding tools and easy access.
Gyro organizers can also be effective for managing threads and small supplies. Efficient organization reduces clutter and improves focus, making my tying sessions more enjoyable.
Best Storage Practices
To maintain a productive workspace, I adhere to several storage best practices. First, I separate materials by type and use labeled containers. This keeps everything in its place and simplifies the selection process.
I also recommend:
- Humidity Control: Use silica gel packets in storage to protect materials from moisture.
- Light Protection: Store materials away from direct sunlight to prevent fading and degradation.
- Regular Inventory Checks: Periodically assess your supplies to avoid overstocking and waste.
Utilizing these strategies enhances the longevity of my materials and ensures that I’m always ready to tie my next fly efficiently.
Essential Fly Tying Accessories
When setting up for fly tying, certain accessories enhance the experience and improve the results. Among these, the fly tying mat and thread are critical components that can influence both the quality of my flies and the efficiency of my tying process.
The Role of the Fly Tying Mat
A fly tying mat serves multiple functions that significantly improve my tying process. It provides a clean and dedicated workspace, which keeps materials organized and minimizes the risk of losing small items.
The mat typically has a textured surface to prevent materials from sliding around. Some mats feature compartments or patterns for easy organization. This helps me avoid clutter and keeps frequently used items within reach.
Additionally, mats can absorb spills and prevent surfaces from getting damaged. Investing in a quality fly tying mat is essential for any serious tier looking to maintain an efficient and tidy workspace.
Selecting Fly Tying Thread
Choosing the right fly tying thread is crucial for both durability and aesthetics. Fly tying thread comes in various materials, including nylon, polyester, and silk. Each material has its unique qualities that impact my tying process.
For example, nylon thread is strong and versatile, making it suitable for various types of flies. On the other hand, silk thread offers a classic appearance and slips easily through materials, providing a refined finish.
Thread thickness is another essential factor. Common sizes include 6/0 and 8/0, with thicker threads providing strength for larger flies. Furthermore, I often consider colors and flatness, as these affect how the final fly looks in the water. Selecting the right thread enhances my ability to create effective and attractive flies.
